DIY: Painting on a Denim jacket with acrylic

I’m going to be honest, I’ve been slow to jump back on the denim / jean jacket bandwagon. Is it possibly because a gang of highschoolers made fun of my jean jacket ten years ago (Jess! Shhh!!) but denim jackets are back and I couldn’t help but be won over when I saw the idea that you could paint beautiful things on jean jackets. I know that it’s been POSSIBLE since before the bedazzled was a thing, but I’d never seen something that made me ITCH to do it until this year.

So I thought I’d take on something completely different and give it a shot.

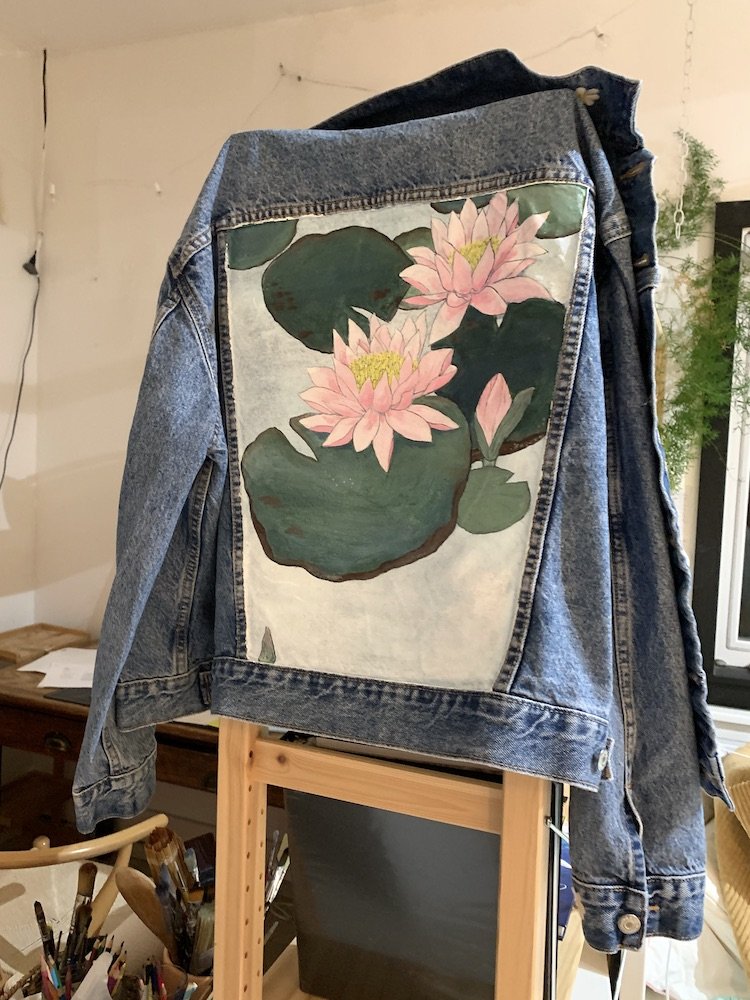
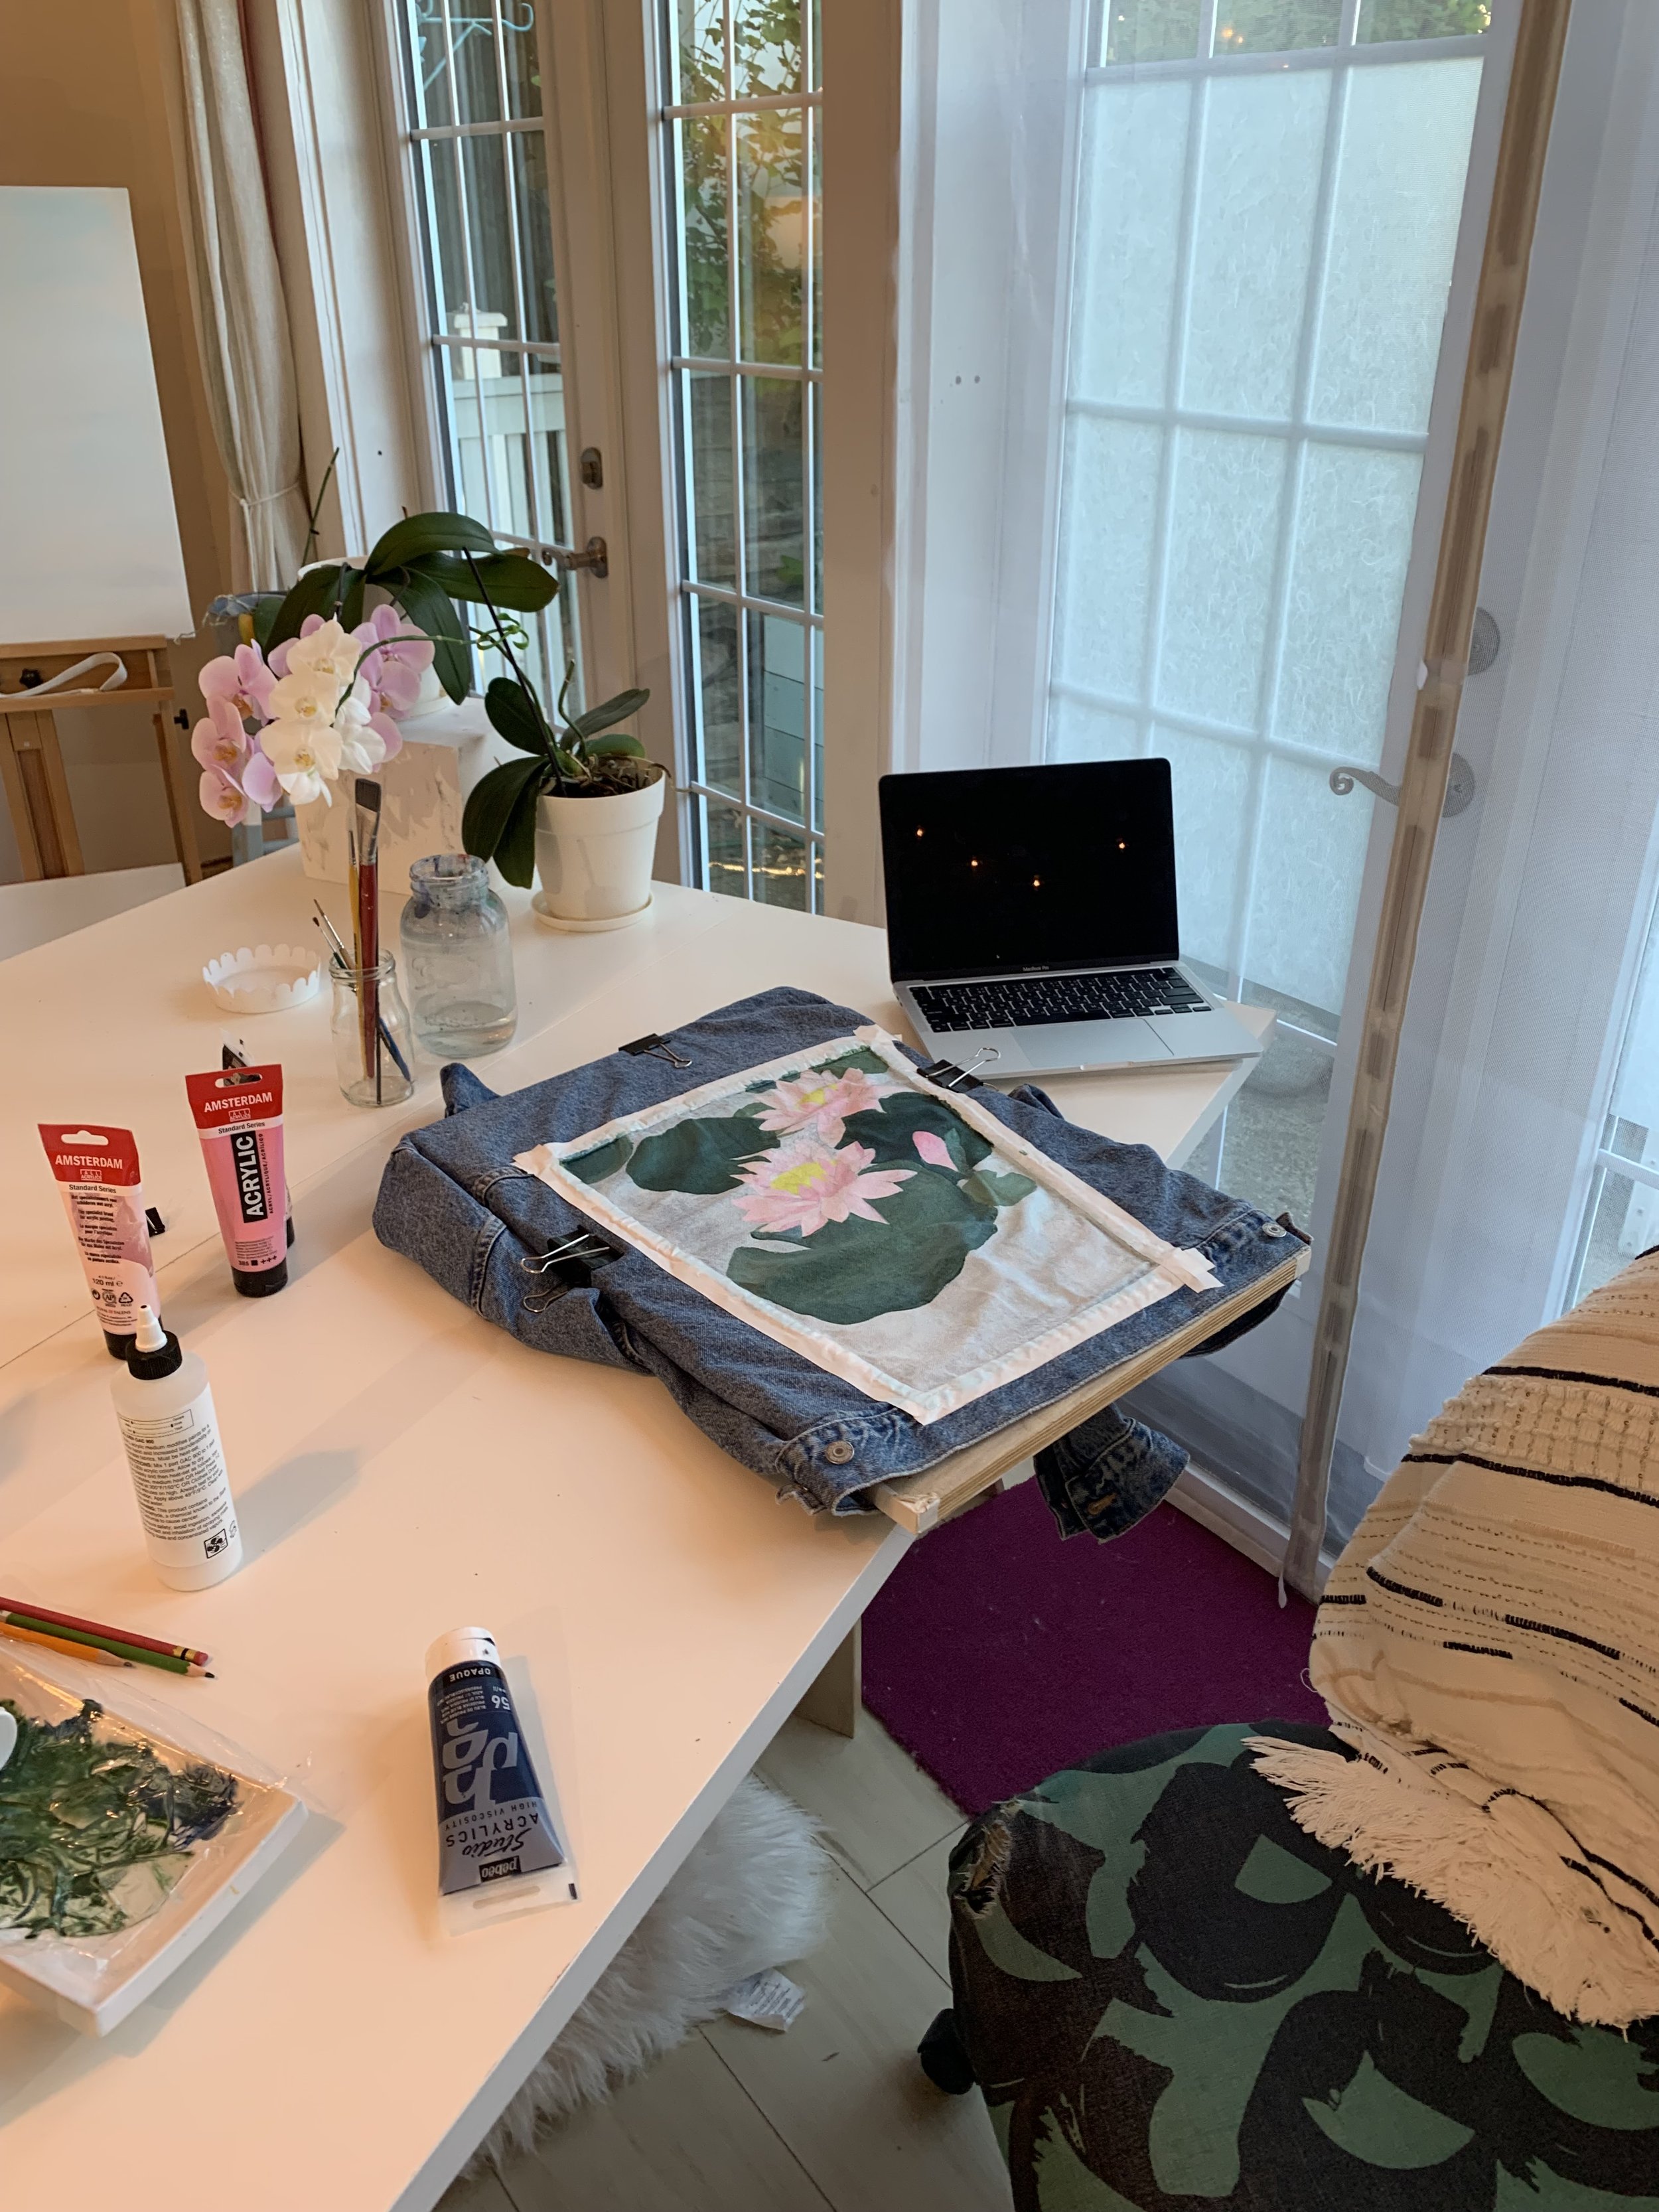
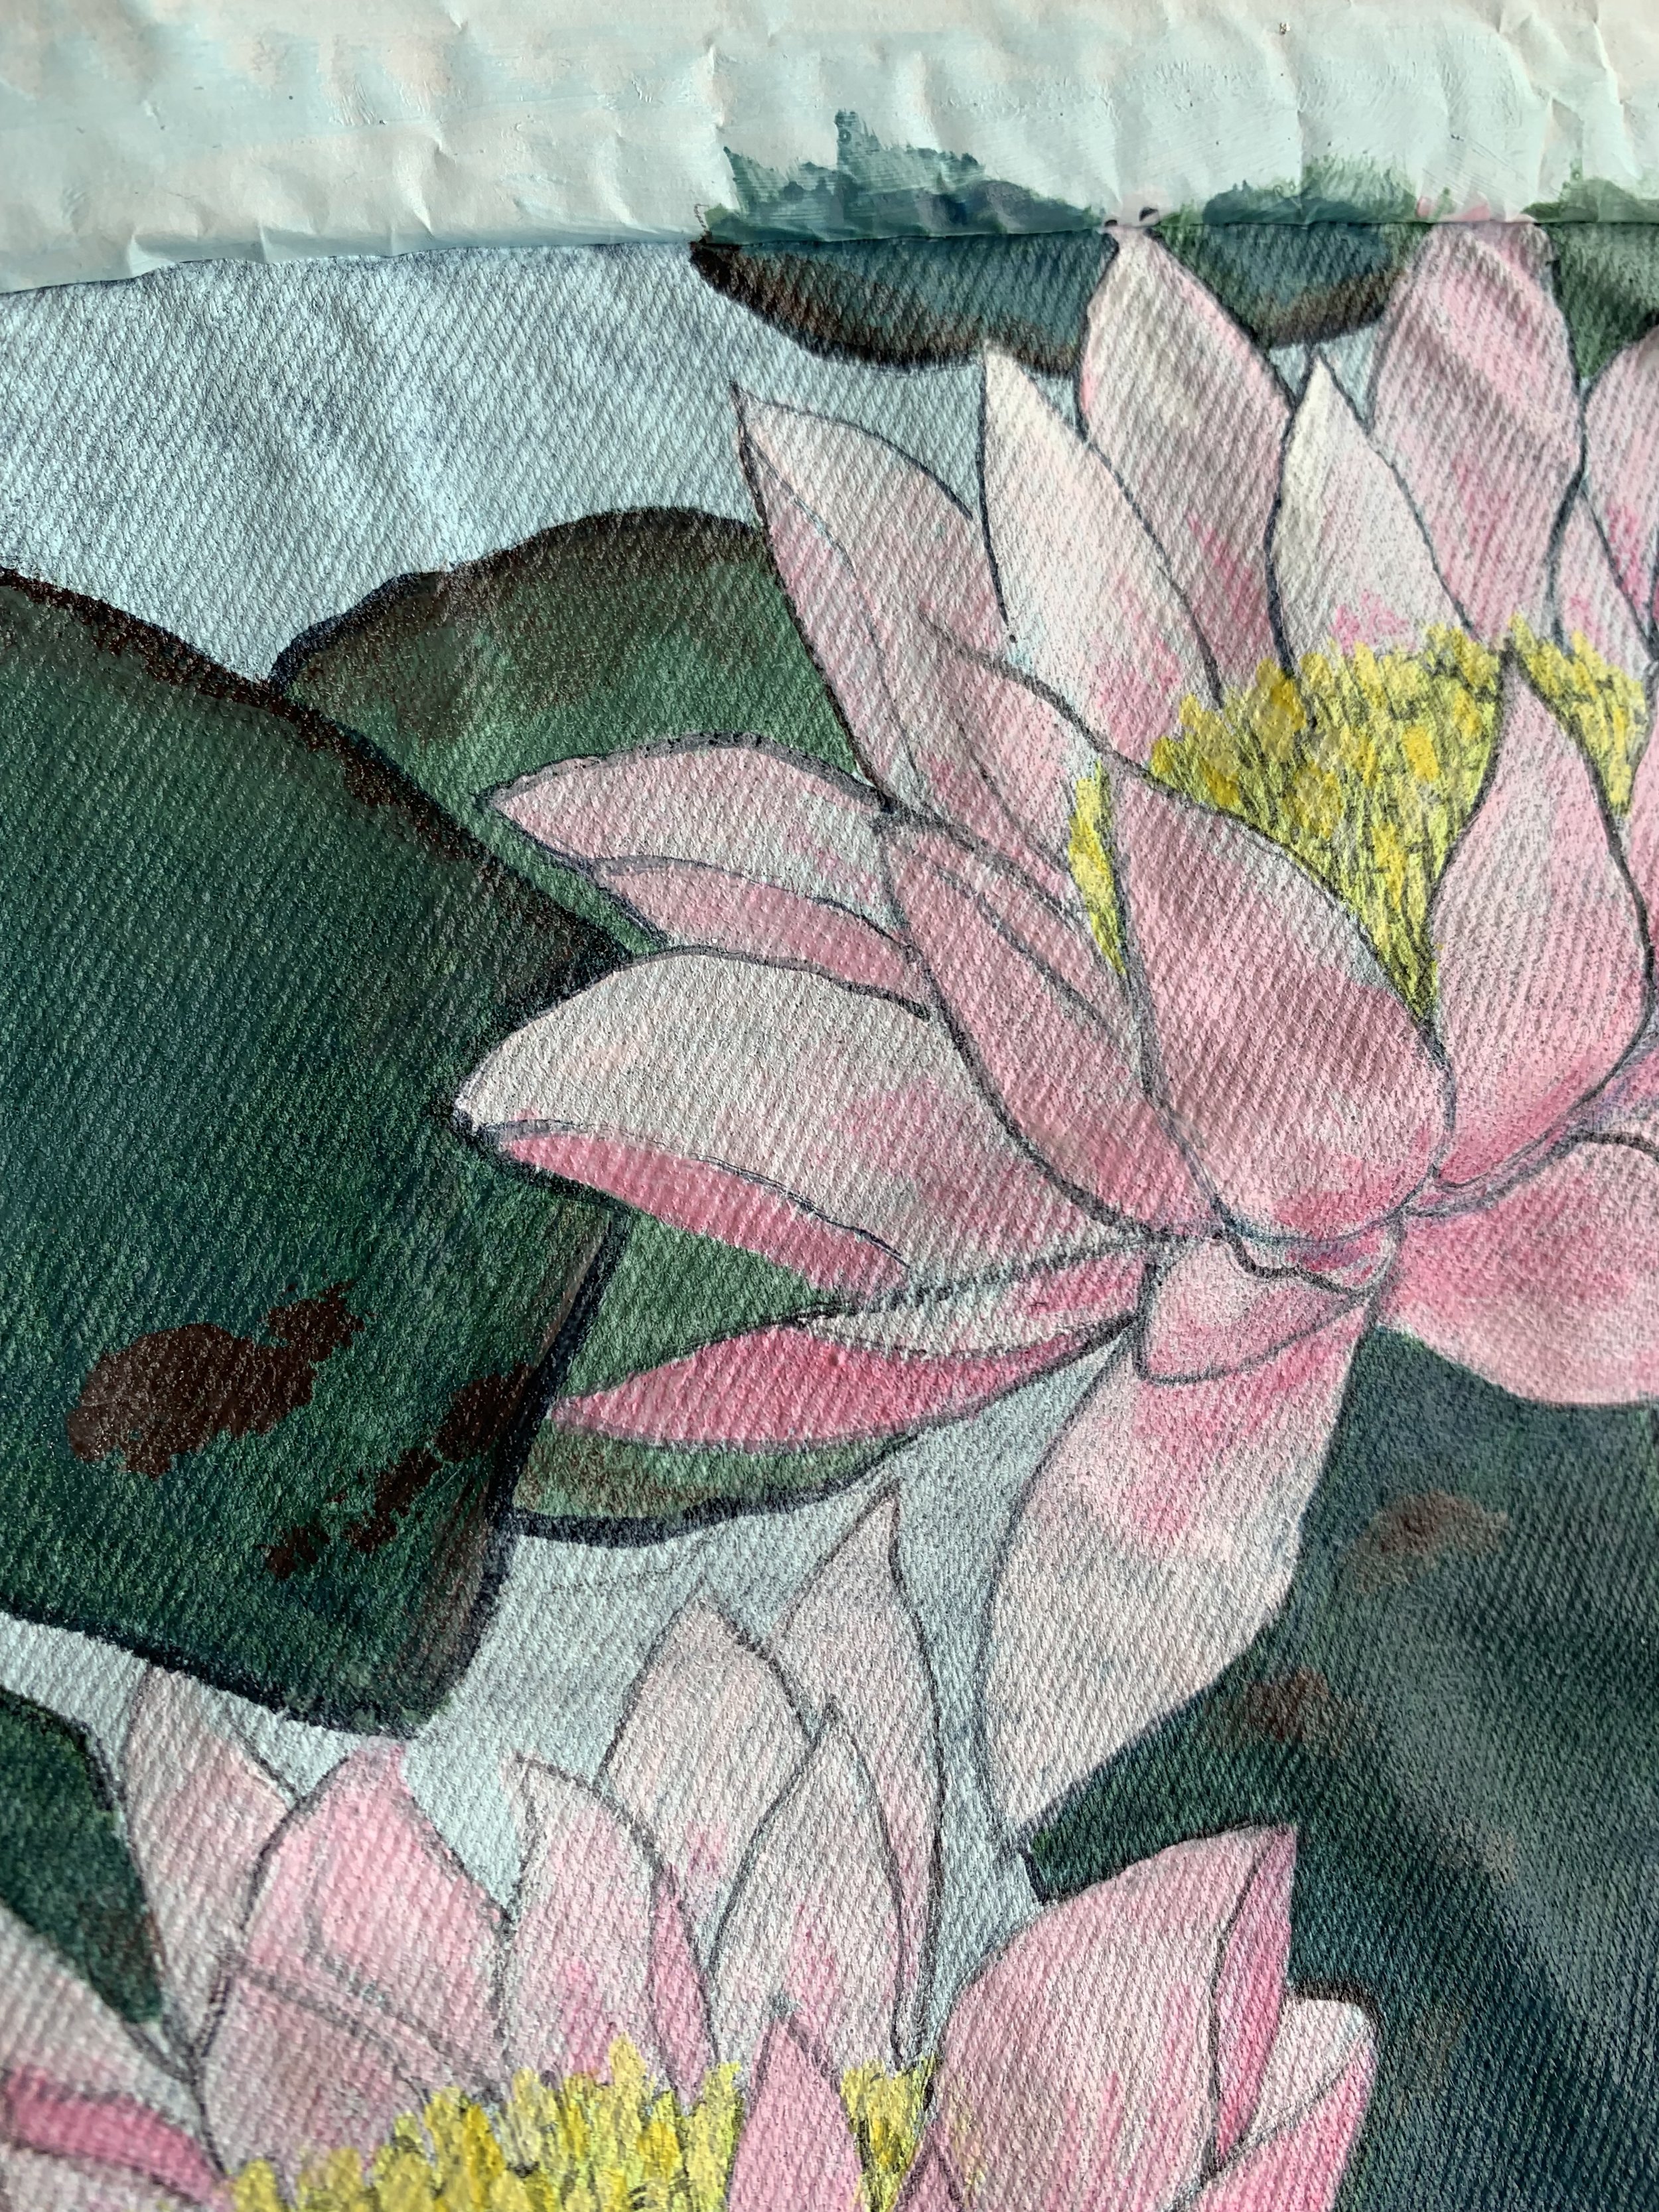
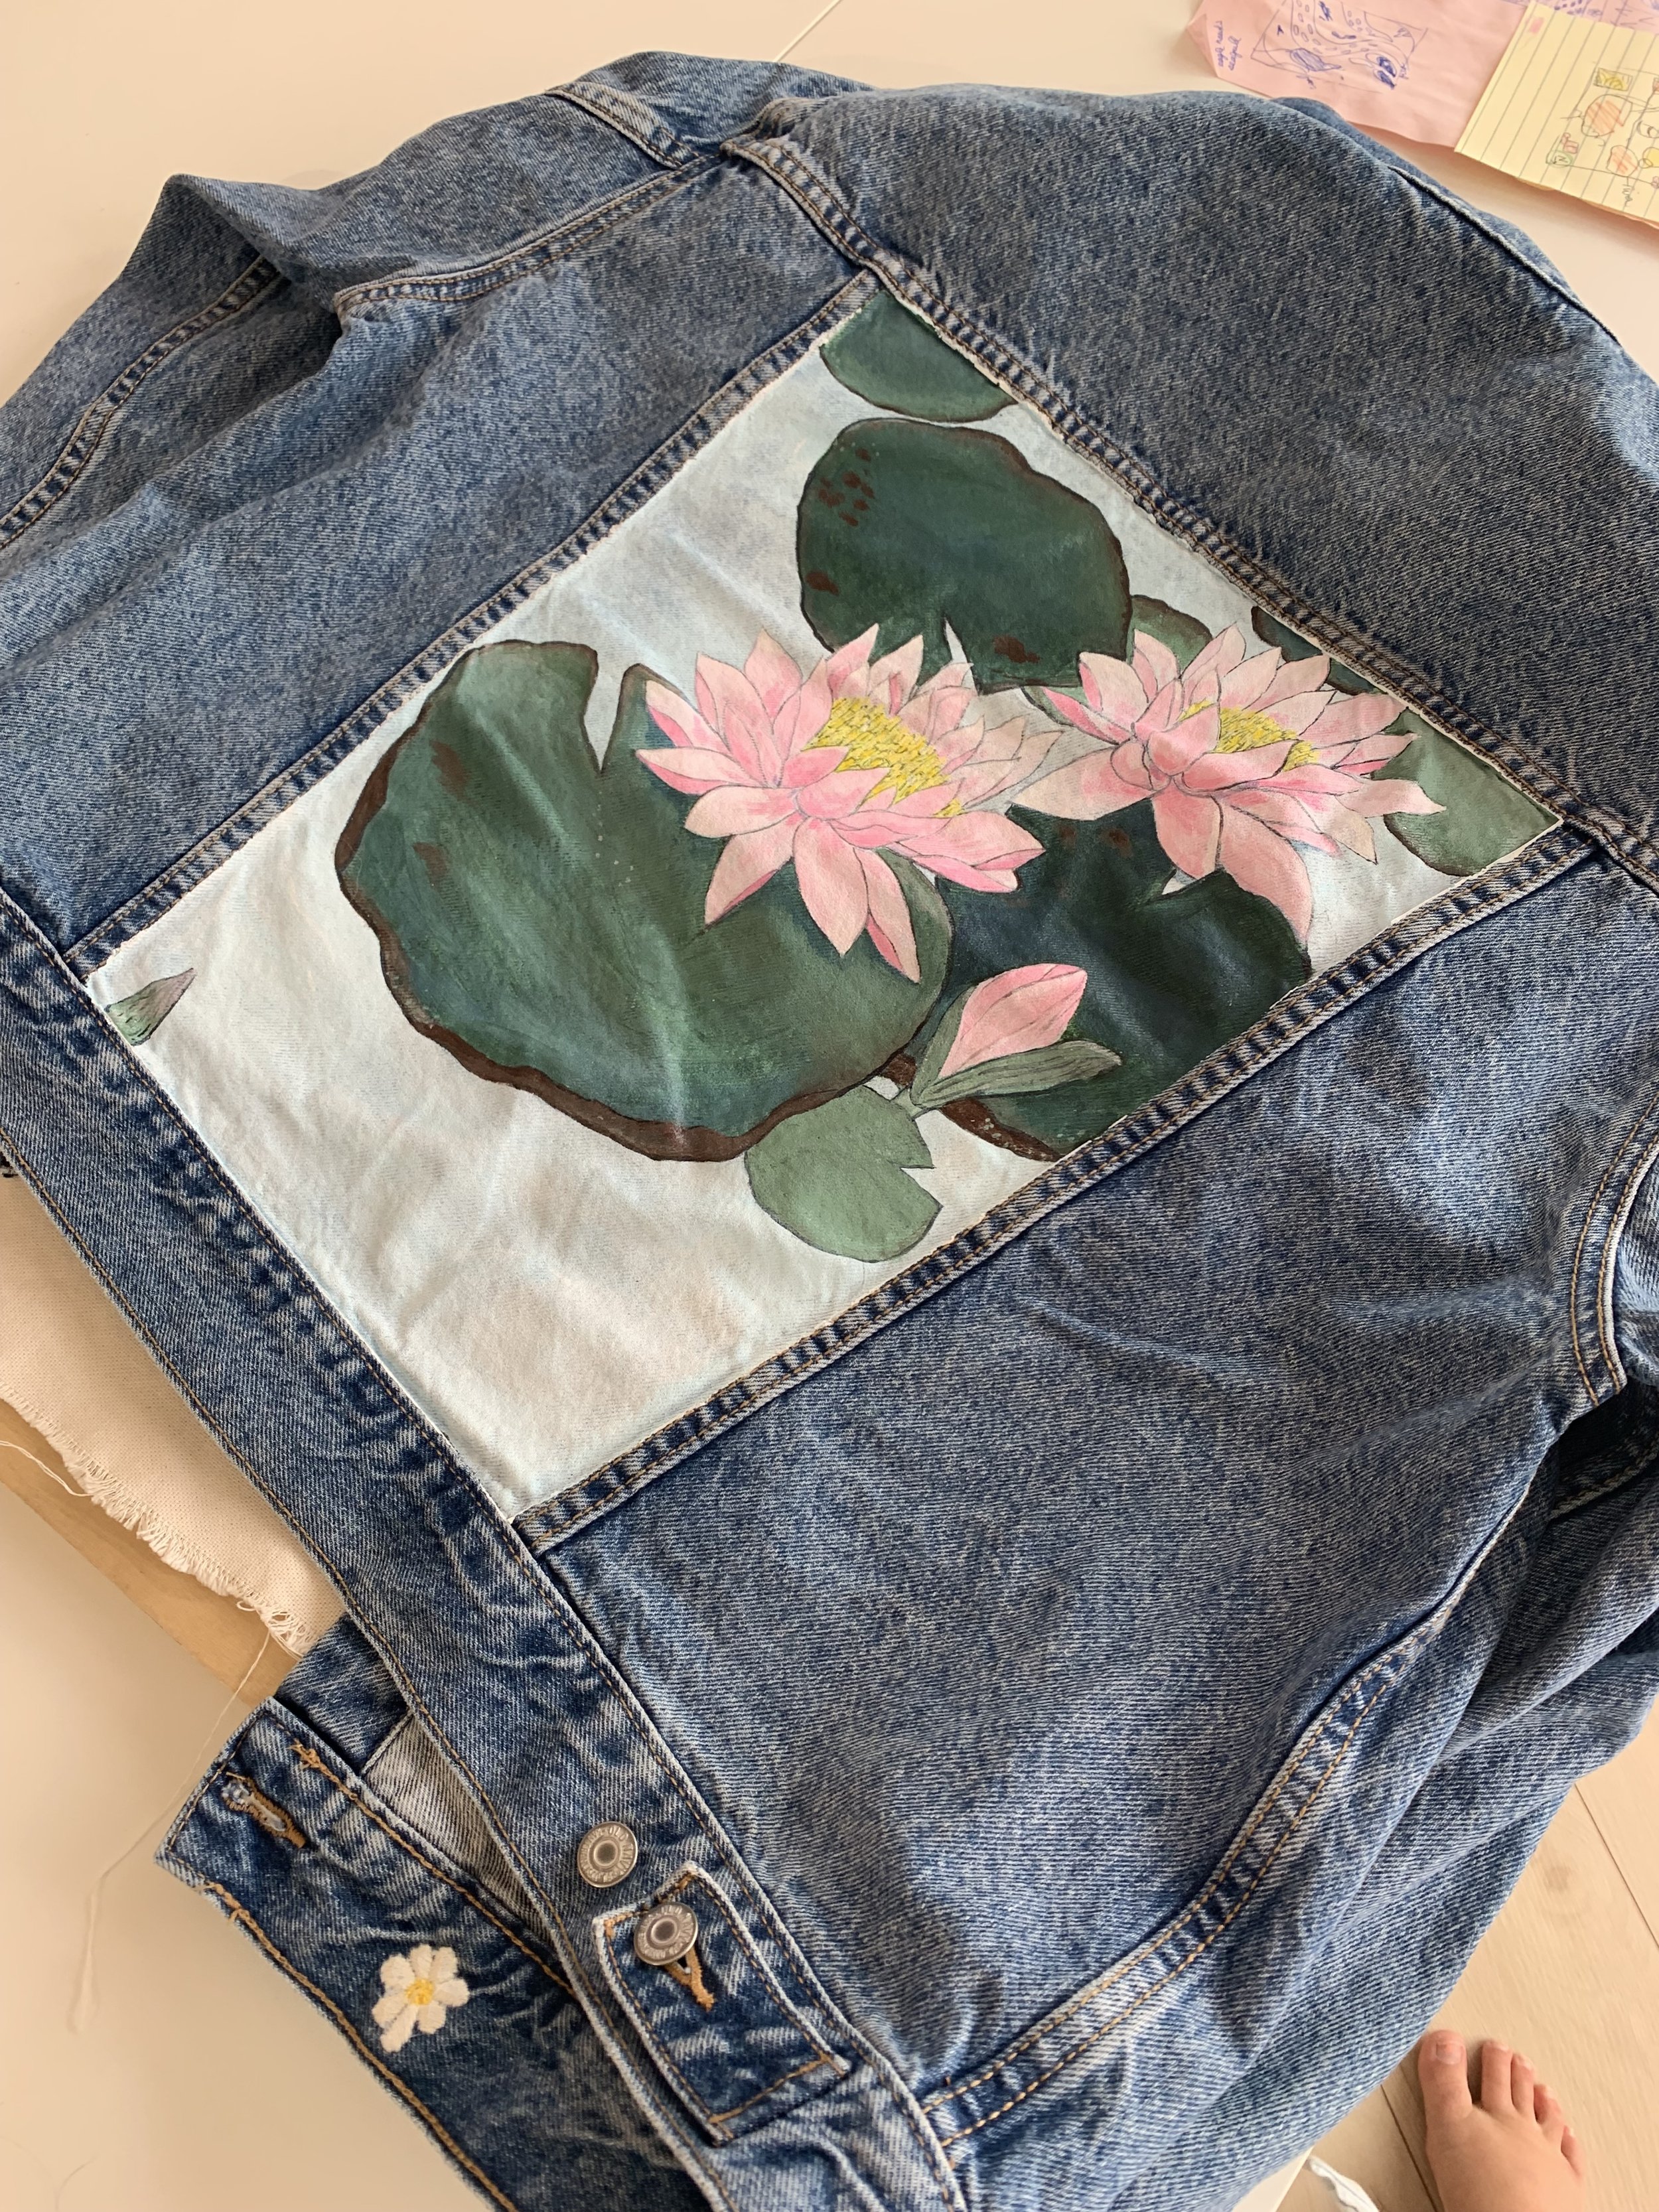
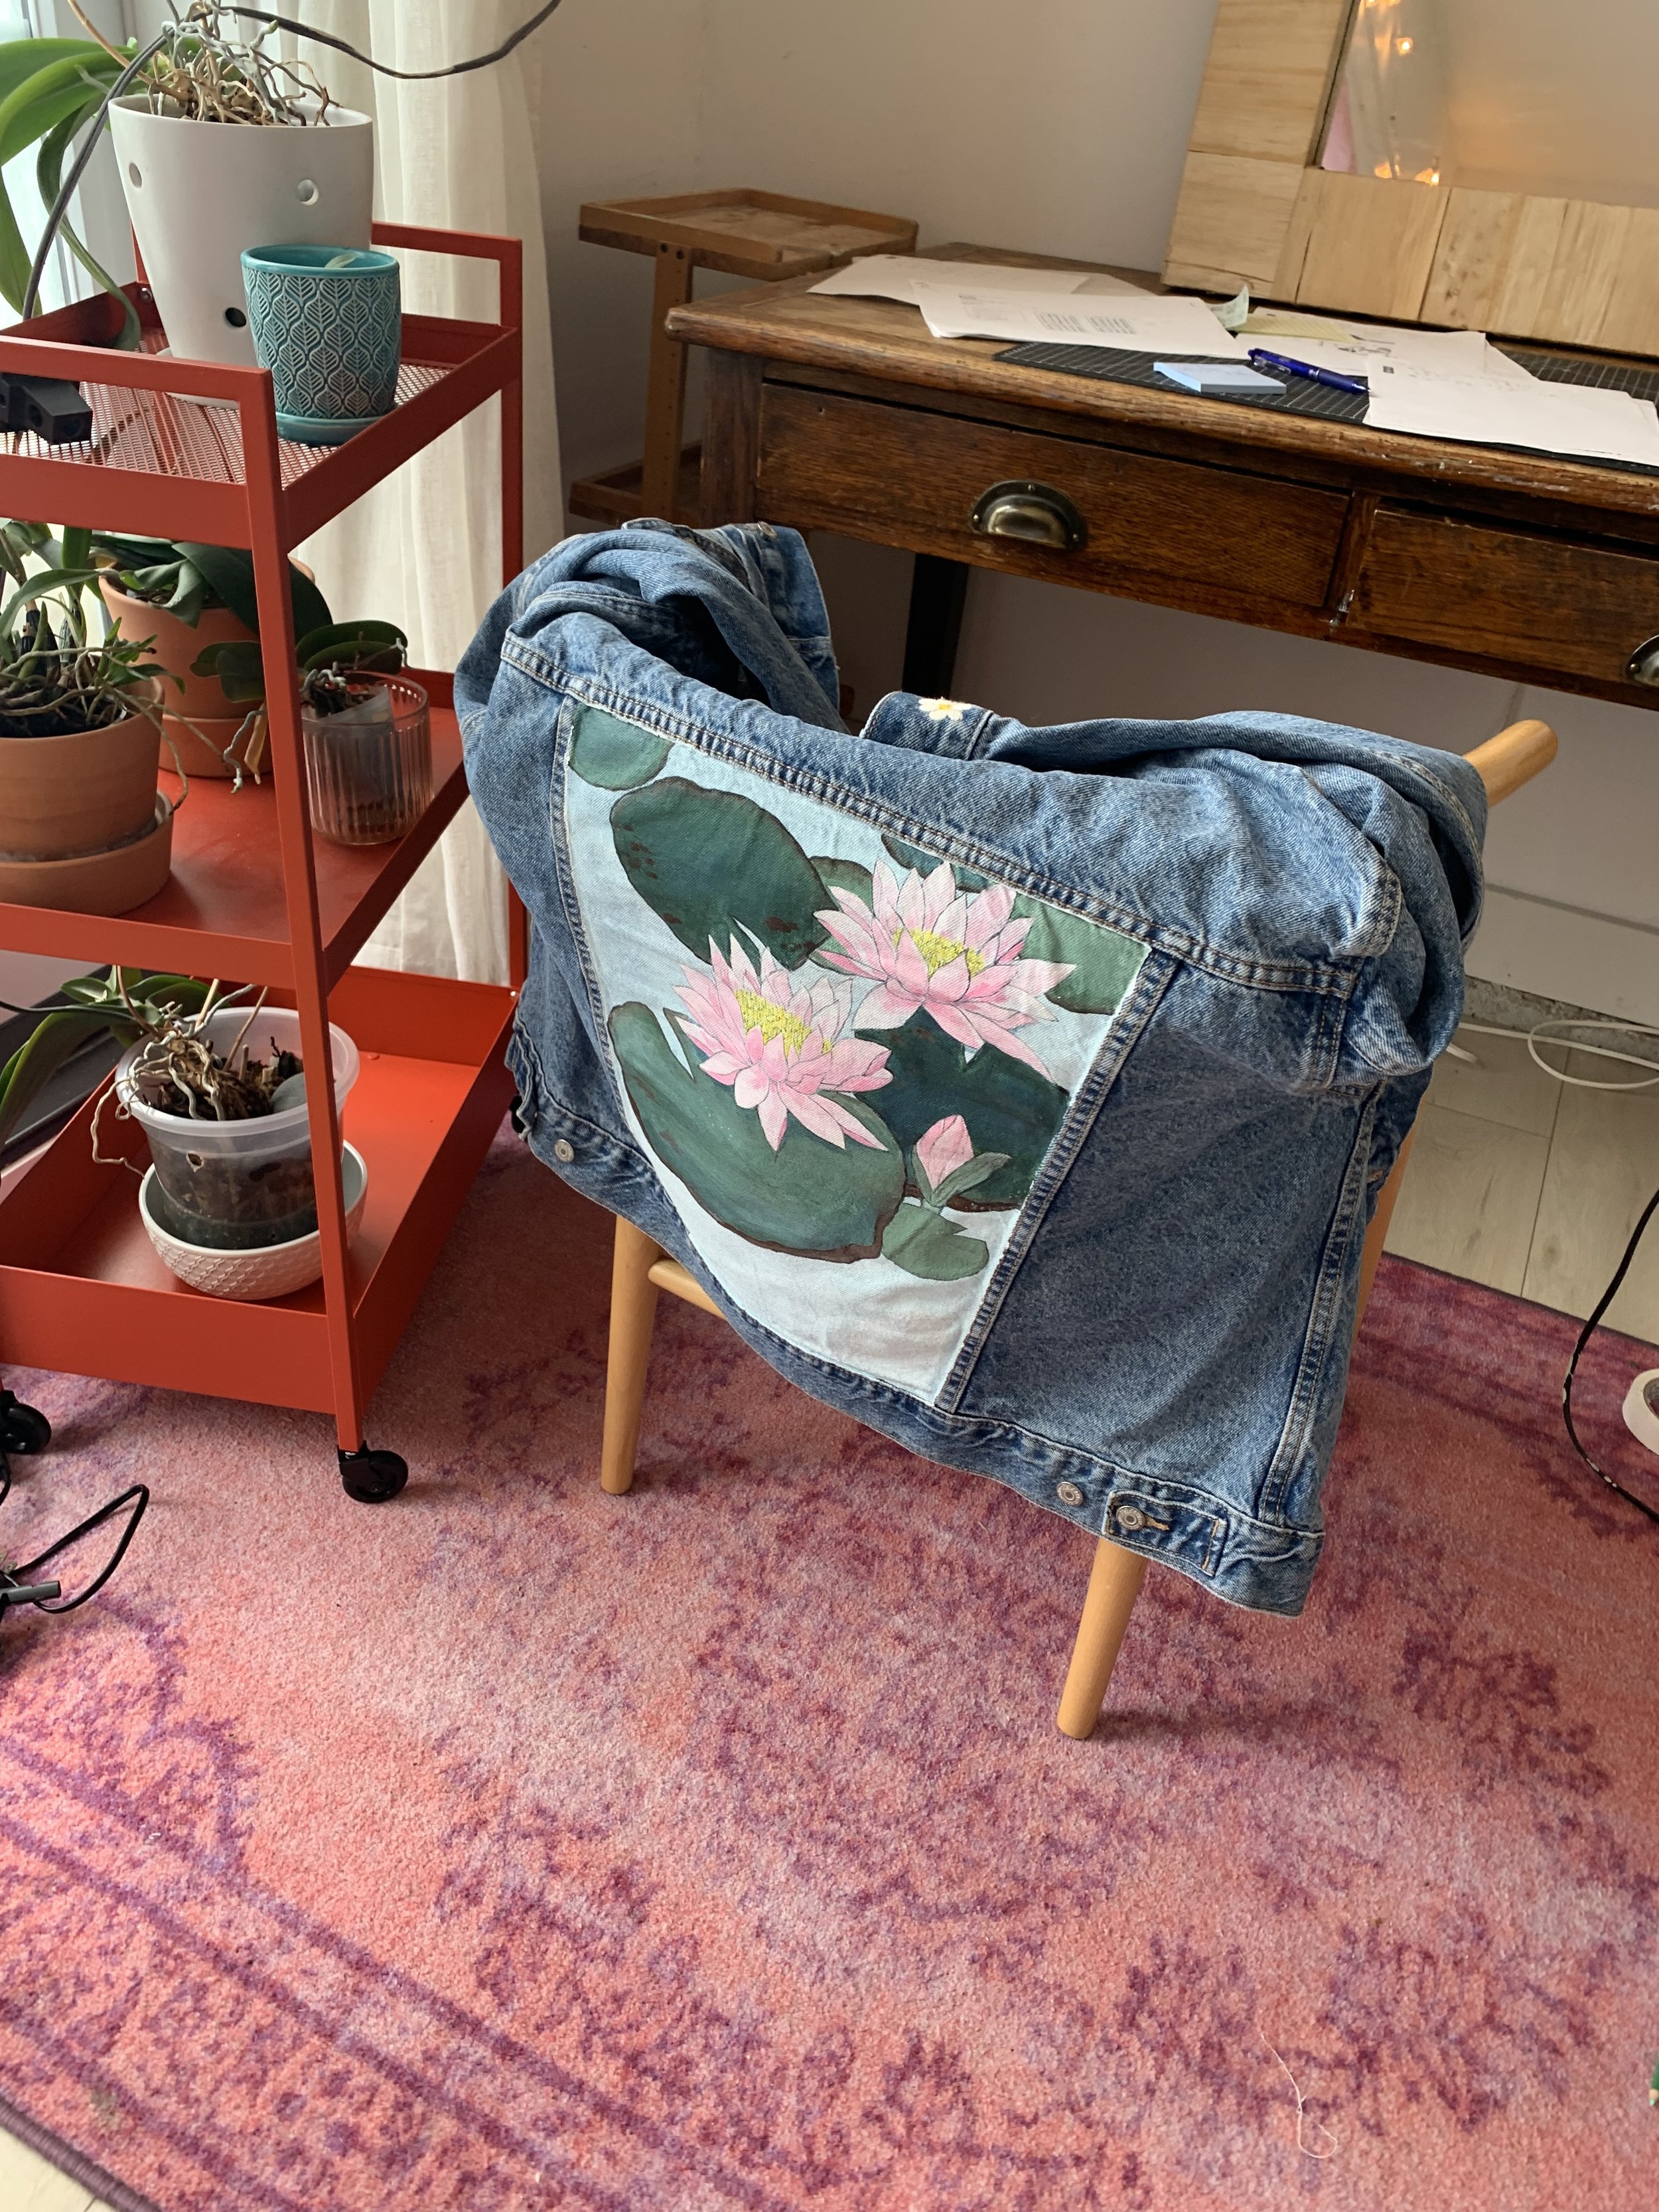
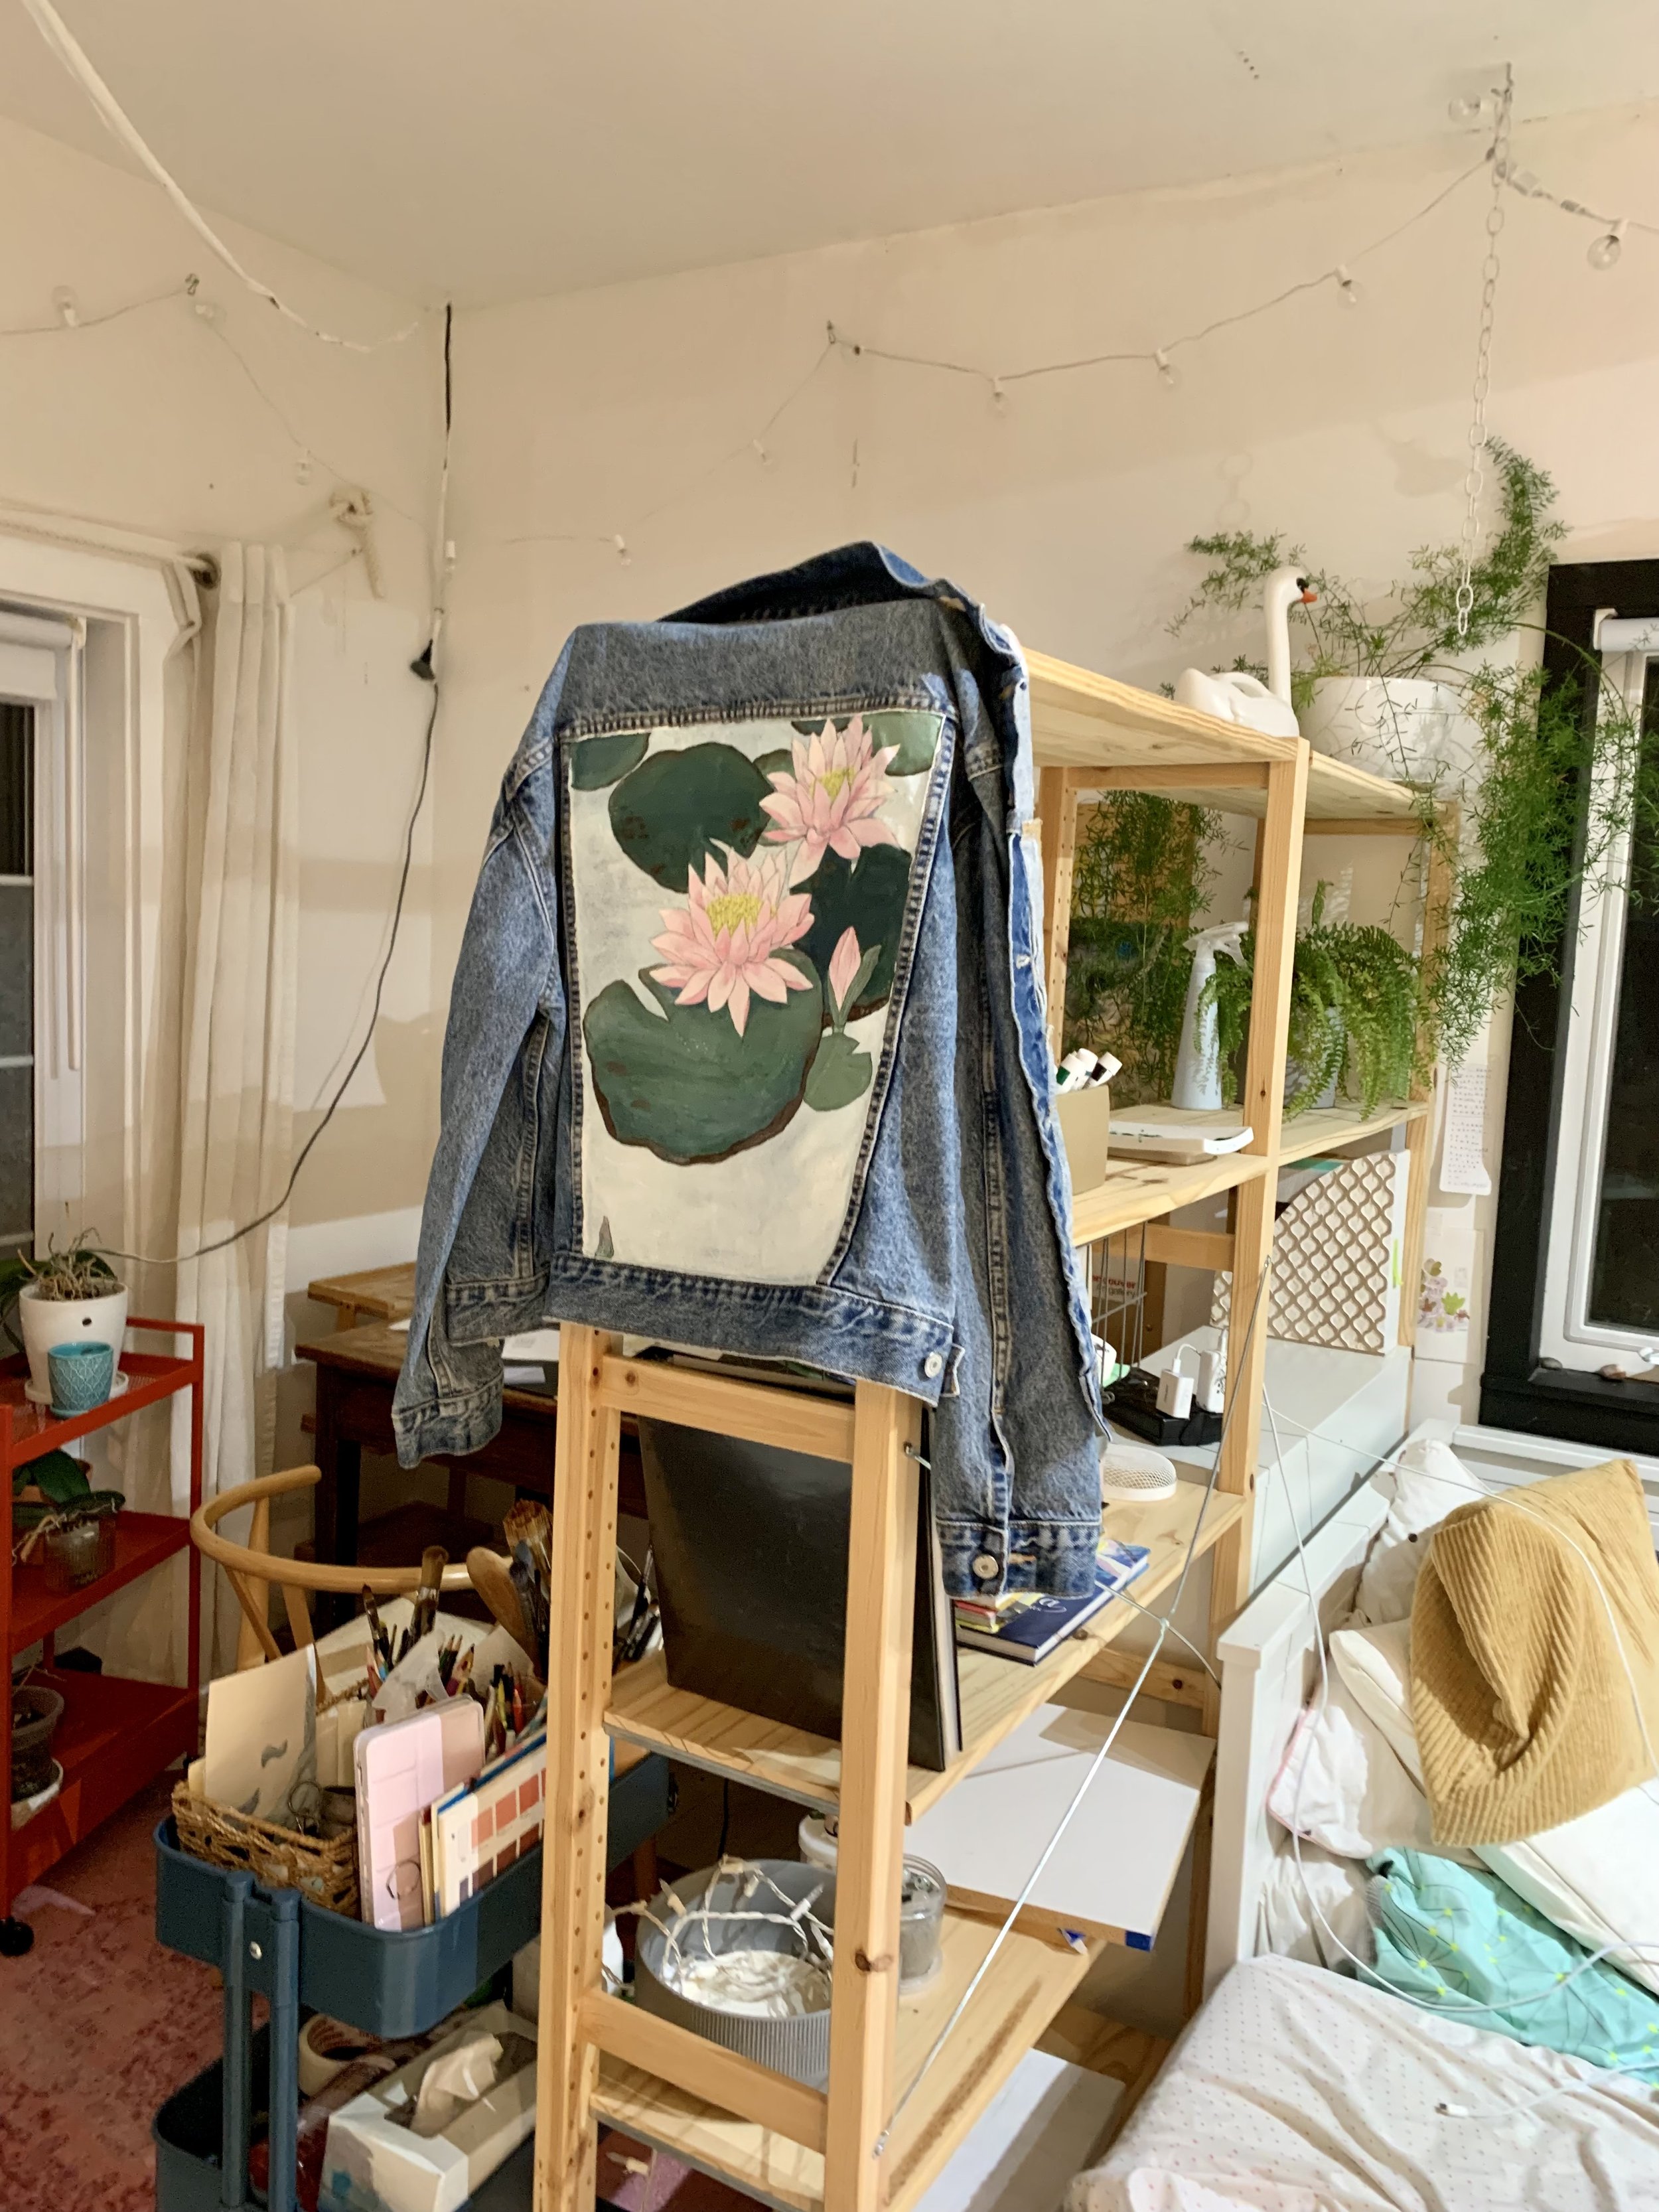
I’m not making you wait — here’s the end result!

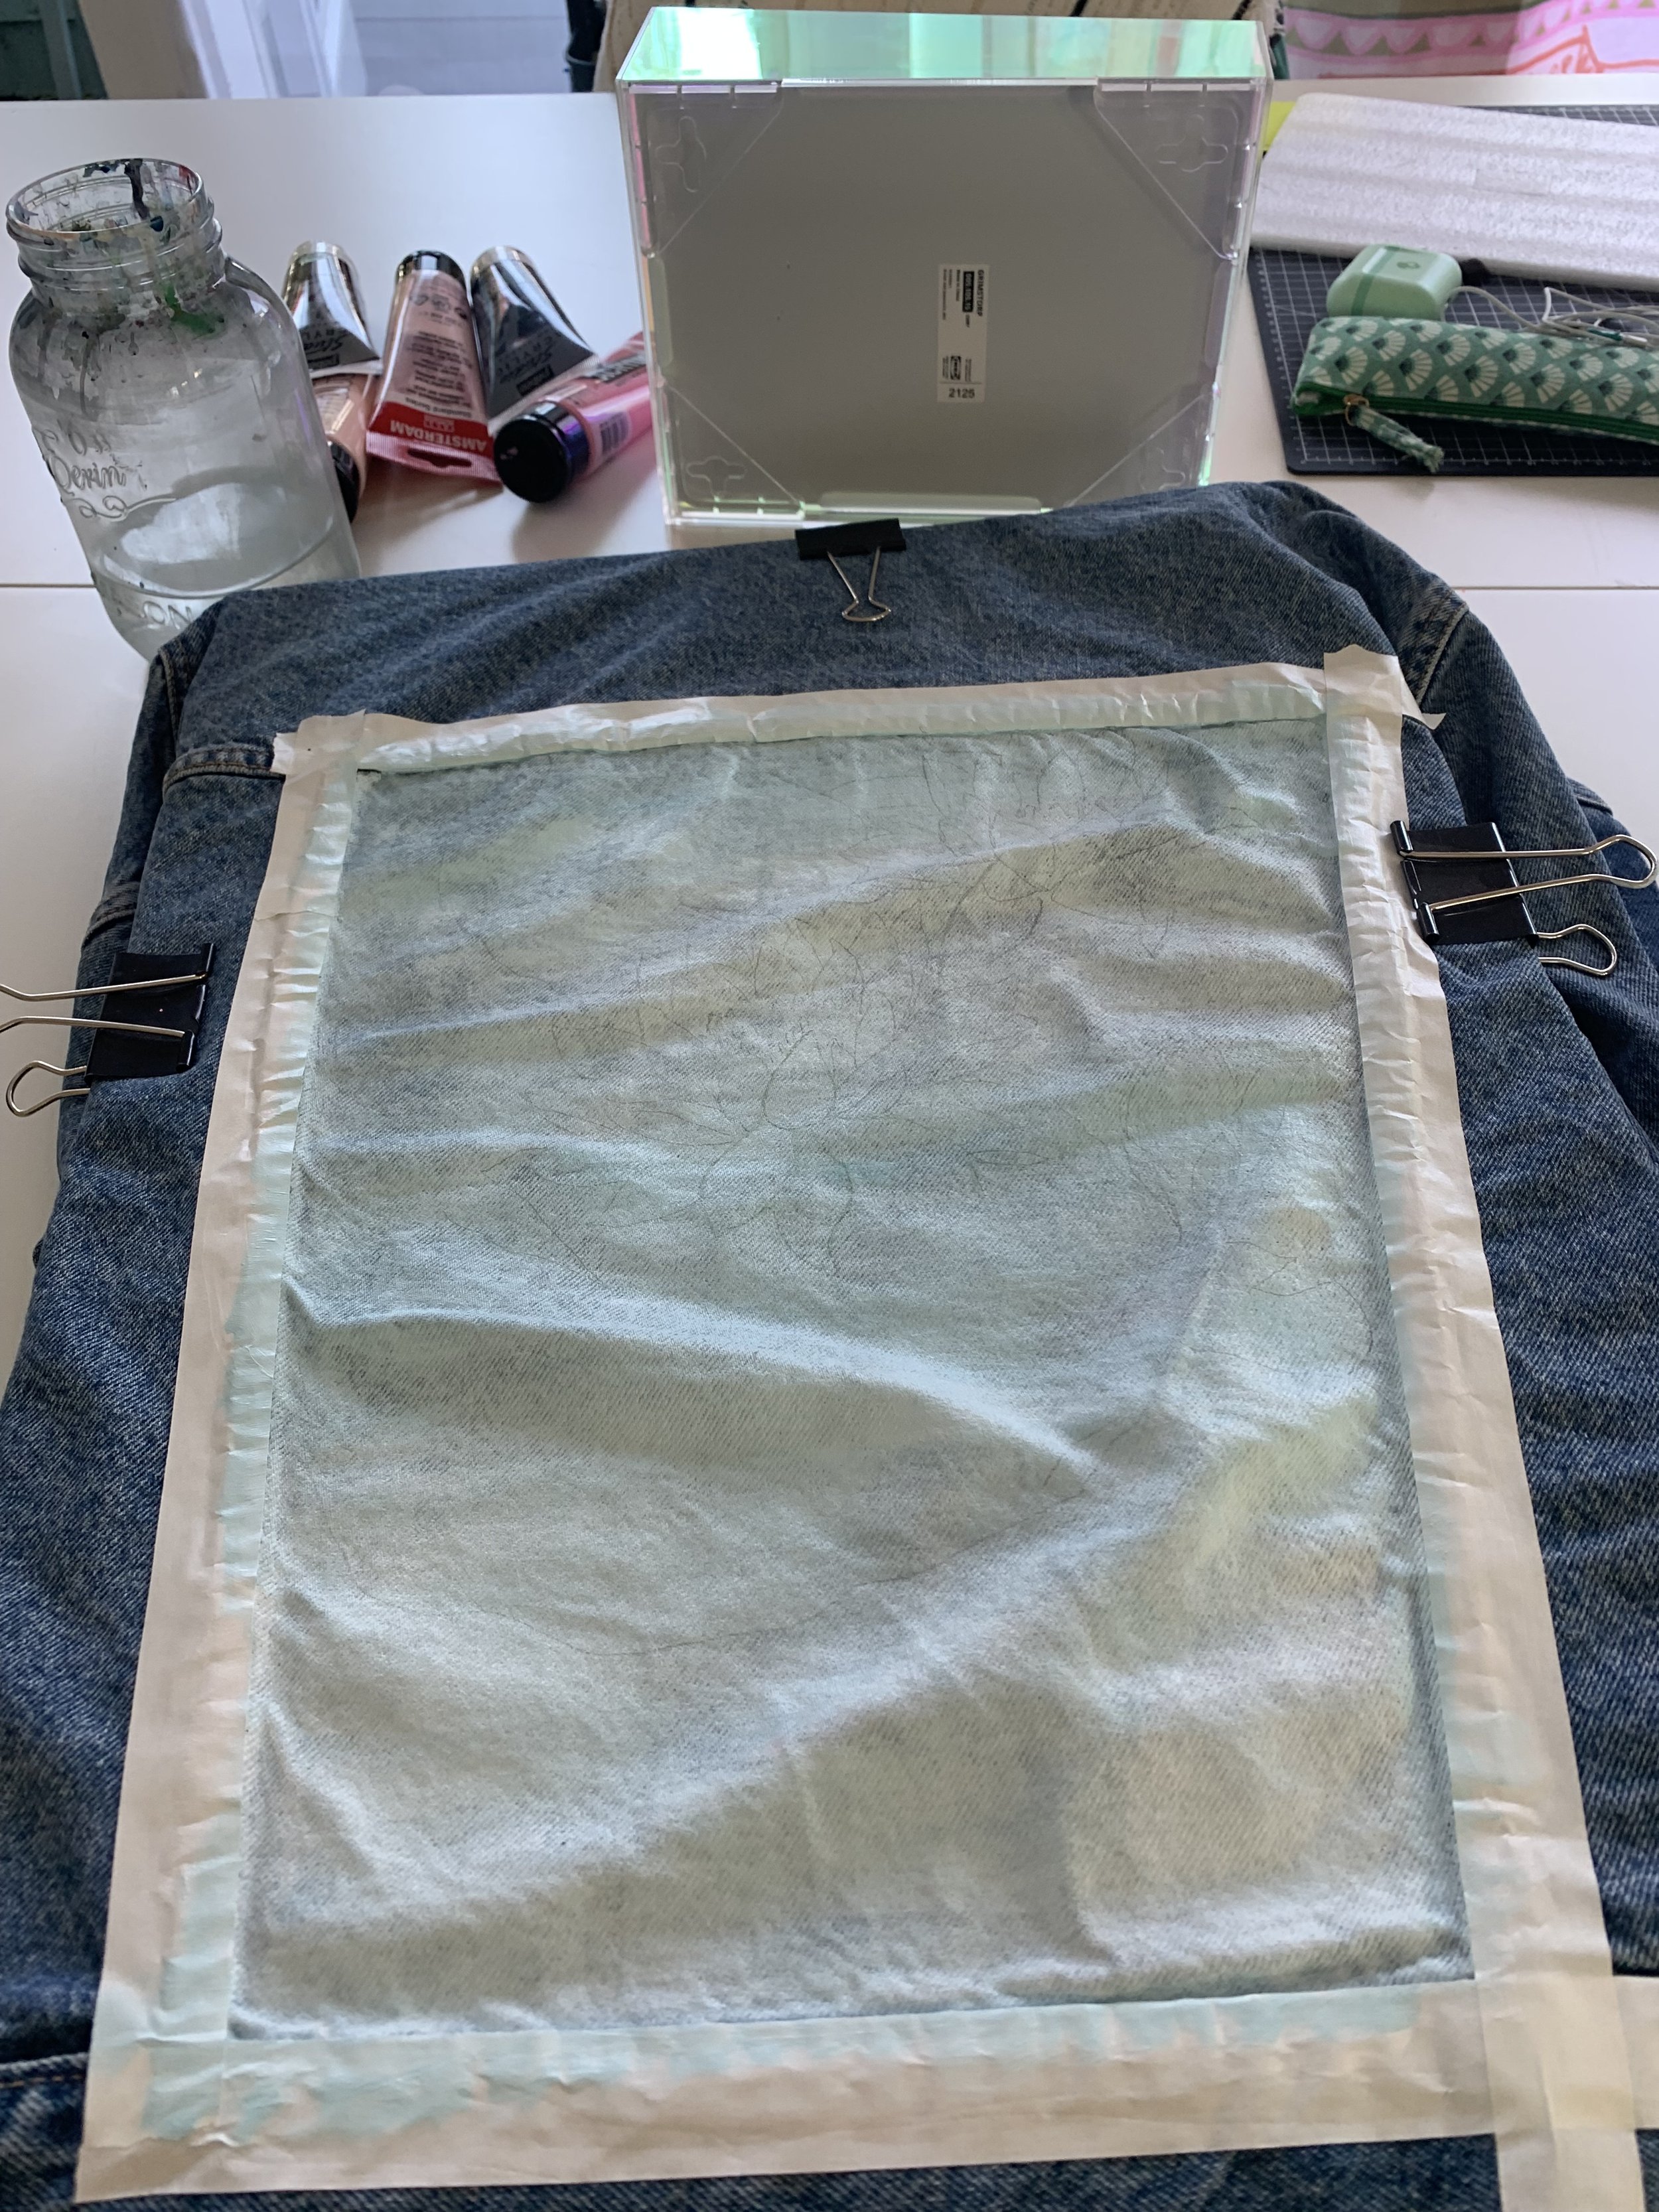
My base jean jacket was found on sale at the Gap for $20. Remember, this is an experiment and if it was expensive I never would have built up the nerve to paint on it.

Why this one? I liked that it had blossoms embroidered in the sleeves. It had a happy face on it that I didn’t really love and, once it arrived, I hate that the smiley goes through each side thereby rendering the pocket useless.

What have a learned? That there are tips and rules, and for every rule there’s a person out there who says that rule doesn’t matter, so take everything on here with a grain of salt.

TIPS:

  • Make sure your jean jacket is solid and not the stretchy kind

  • Paint layers thinly and allow them to dry. I used the same kind of acrylic paint that I use for making canvas paintings.

  • If you’re paranoid like me / want to help make sure it doesn’t crack or look like crap, maybe it’s a good idea to get clothing medium (Golden GAC 900) to mix into your paint to help it bend. I used about 1 part medium to 2 parts paint. I am a heathen who likes to add water to paint generally, but absolutely try to only add minimal water to your paint! In lieu of excessive water, the medium helped a lot.

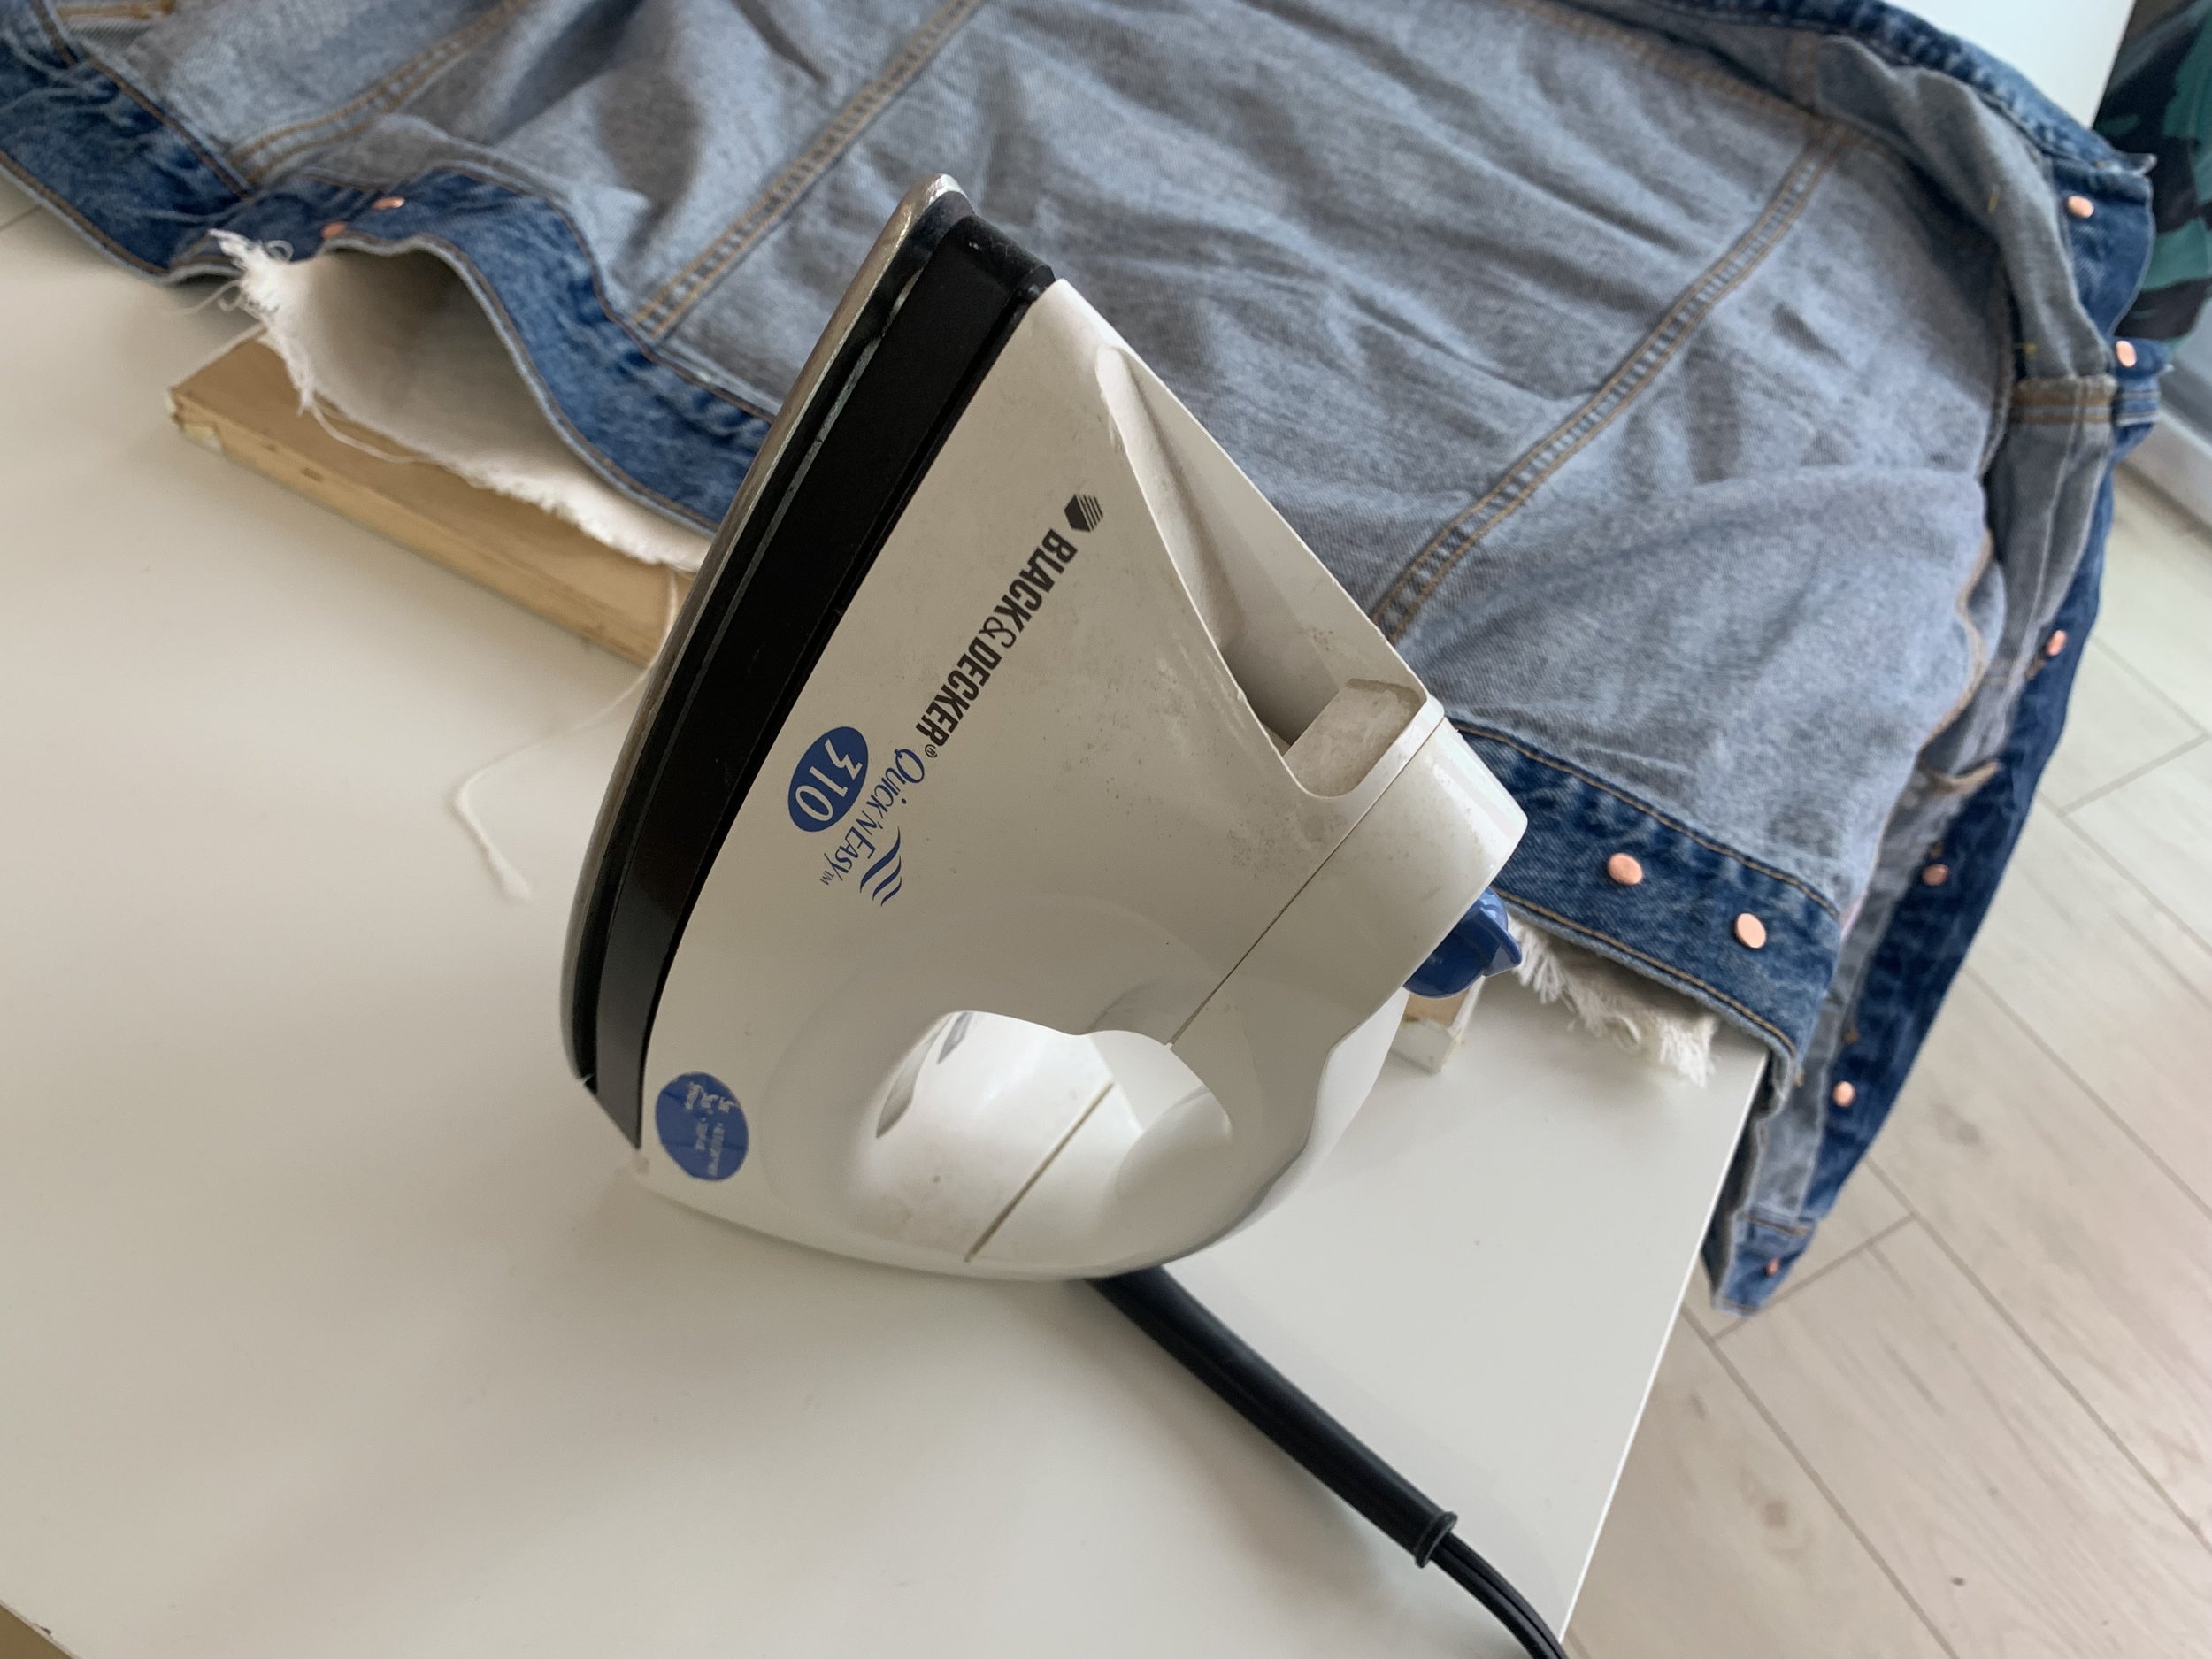
  • Heat set your jean jacket after it’s all done. I tried to do this with an iron — I think (?) successfully? Full disclosure, I have not tried to wash my denim jacket yet, as I generally try to wash denim as little as possible unless you fall in mud or something. Other people use their clothing dryer to set by running it for 30 mins.

How did it turn out?

Well this jean jacket survived a month in Australia with me wearing it once in a while and tolerated me bending it to try to cram it into a carry-on suitcase several times. It has not cracked!!

BUILDING CAT STAIRS PT 1 & 2

I love my little studio cats Mina & Coco. They’re growing fast and it’s been hard trying to keep them indoors. They are very curious, whiley cats. Mina has already taught herself to push down on door knobs. They want out, but I’m trying to keep them safe. We have future plans to build them a catio. But in the meantime, I thought why don’t we take advantage of the vertical space we have in the house and build them some cat stairs to use and hang out on?

I’ve always admired how cute cat stairs are. However they’re also super expensive to buy — I just can’t justify $100 per piece of a cat shelf / stairs setup. So why not try building my own? At this step Pinterest was my best friend. There were so many cute ideas online, though some of them were really unclear in terms of how they were properly supporting a cat’s weight. So take that as my advice to only use ideas online (including mine!) as a base idea, but it’s up to you to make sure that a structure is strong and that it is supported by studs in your walls.

My fave example, from Homedit.com

Normally I find sketching building ideas to be quite easy, however the space I had in mind had a few new challenges. First, getting the heights over widths correct — I wanted stairs that would both meet the second floor beam, and reach the second floor high window. (Note, the cats were already debating about jumping from this beam TO the high window, so these stairs would be a way to keep them safer than if they were attempting this Darwan-award level jump.)

The second challenge was that I wanted to use the corner area, which would also help is solidifying the whole thing. But drawing across three dimensions in this way was unique for me. It’s not like building a deck, where I can just focus on one plane at a time.

After a lot of research and a lot of sketching I found something I thought could work and we got to building! You should customize your design to your own space. Things to keep in mind: cats feel more comfortable climbing steps that are not too high or to smooshed, and this will change as they grow up, if they are currently young cats. We may end up changing the distance of the stairs if our cats get very large.

Materials we used: Screws Wood 1” x 8”  , 1”x 12”, 1”x1”s , Saw, Drill, shelf supports ours were extras from Home Hardware, Scrap carpet pieces, or something you can use as grips for the tops of the wood so that it is less slippery for kitty feet.

DIY Mini Studio Makeover! Phase 1!

We put a little elbow grease into our garage art studio this summer and here's the result! It's not perfect but it's 100% cosier, cleaner, eclectic and fun. We even painted in the awkward corners.

Notes:
-This is a garage floor with some pretty permanent stains short of power washing
-I use the desk spaces for watercolour, gouache, acrylic and editing, and I tend to use the couch space for digital drawing and watching tv/movies.
-Let me know below if you want to learn more about the partition. I couldn't remove the stamp stains with sanding, unfortunately. So short of painting it, which I might, I'm out of luck with those and I tend to just put pictures on top.
-I forgot my iPad on the couch in the final after shots. You're welcome :0)
Nothing in this video is sponsored. Kitchenette is from ikea Swing is from Etsy Paper curtain is Tord Boontje Rug is from Wayfair Map hanging is from Urban Outfitters but you might be able to find it in other places.